Tillandsia is an exotic plant native to the tropics. Maintenance is simple, but it is necessary to organize certain climatic conditions, which is possible not in every apartment. There are two main groups that differ significantly from each other. Each of them has its own characteristics, features of care, reproduction and transplantation.
Content
What a plant looks like in its natural environment
Tillandsia comes from the tropics and subtropics. She belongs to the Bromeliad family. In the wild, the flower is found in equatorial Africa and South America (southern USA, Argentina and Mexico).
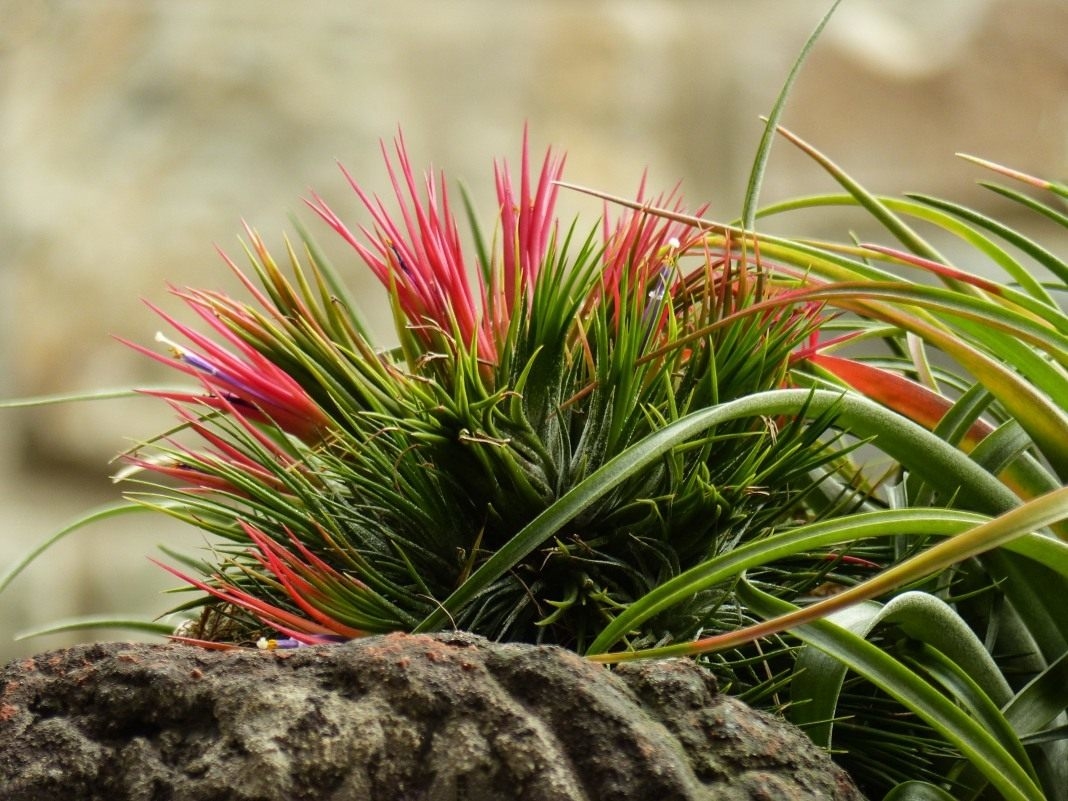
The peculiarity of tillandsia is that it grows on other plants, that is, it belongs to epiphytes. The plant lives on trees and snags, to which it clings with roots, it extracts water from the air using special scales.
You should not choose this flower for people who in winter the temperature in the apartment drops below 18 ° C or does not get enough sunlight.
It is also not suitable for those who like to travel - the plant needs regular spraying and changing lighting (direct sunlight must be avoided).
How is used in the interior
There are two main types of flowers. Some are intended for growing in a pot, they have predominantly green leaves without pubescence. In the interior, they are used as ordinary indoor plants growing in pots, they have an unusually beautiful color.
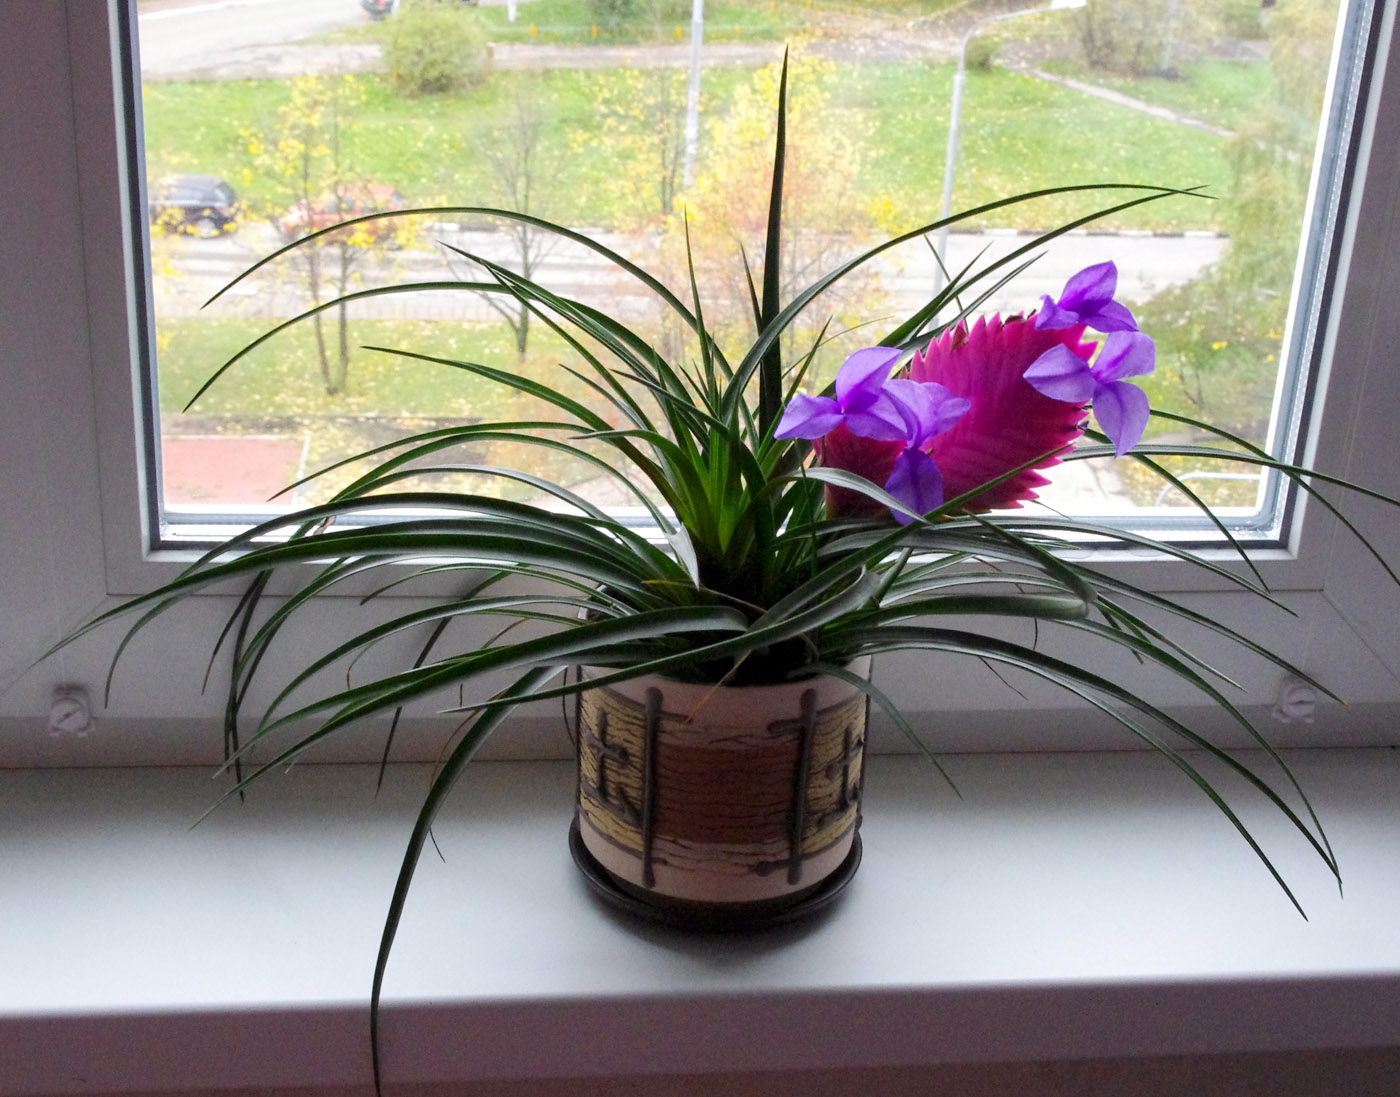
Others - atmospheric tillandsia, have pubescence, which is why the leaves look silvery. They are of particular interest to designers and are used in a variety of compositions. Most often grown in florarium.
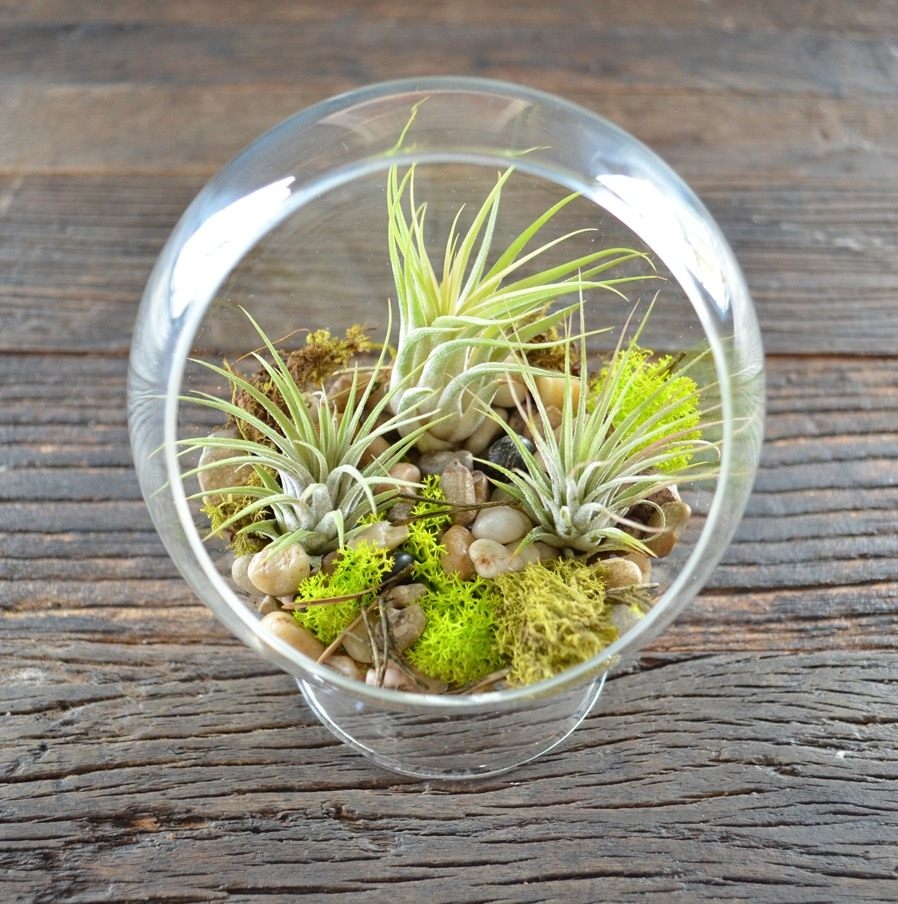
Or crystals.
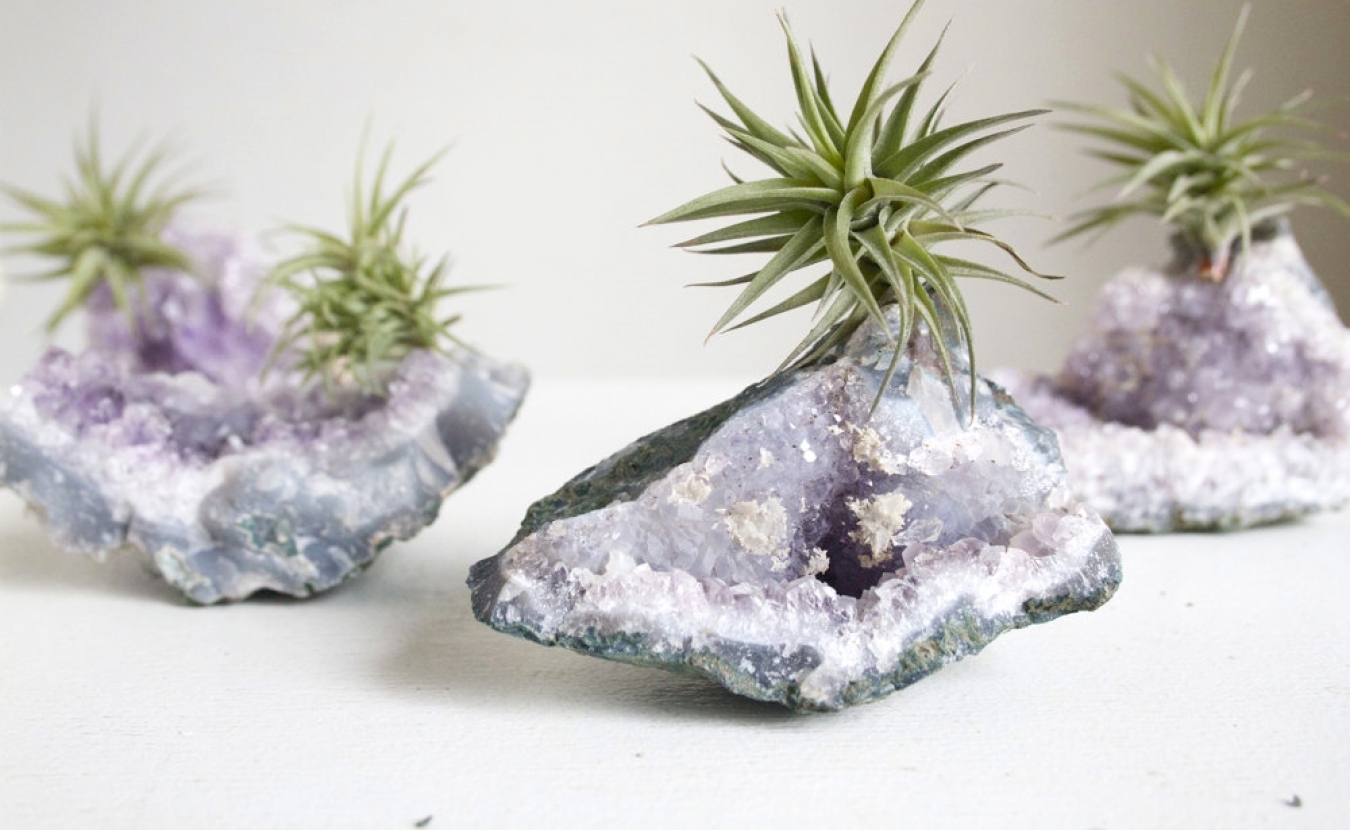
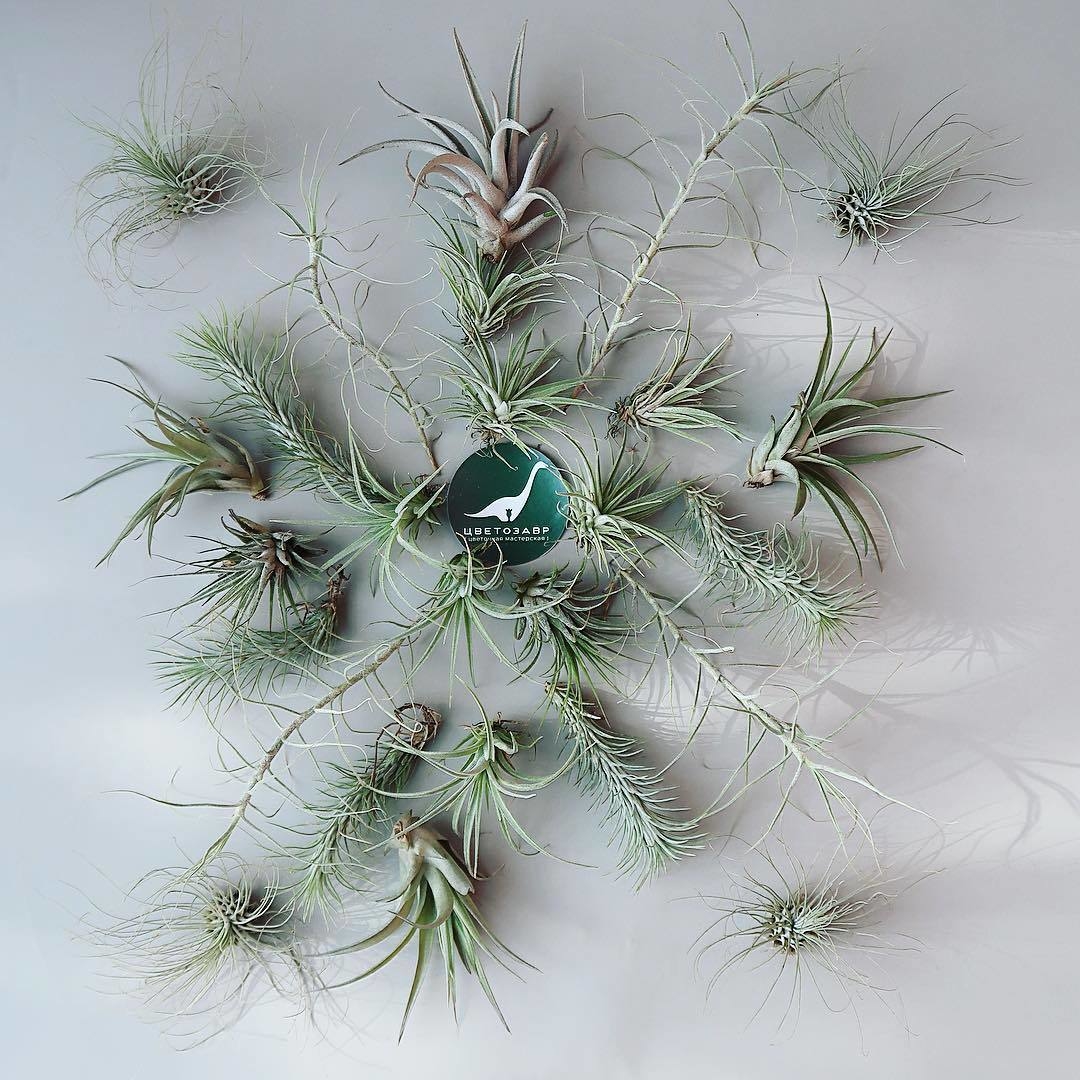
It can be placed along the wall on special devices.
Types and varieties
The following varieties are mainly used for growing at home.
Usneiform tillandsia
The name is also found - mossy or Spanish moss. One of the atmospheric varieties.
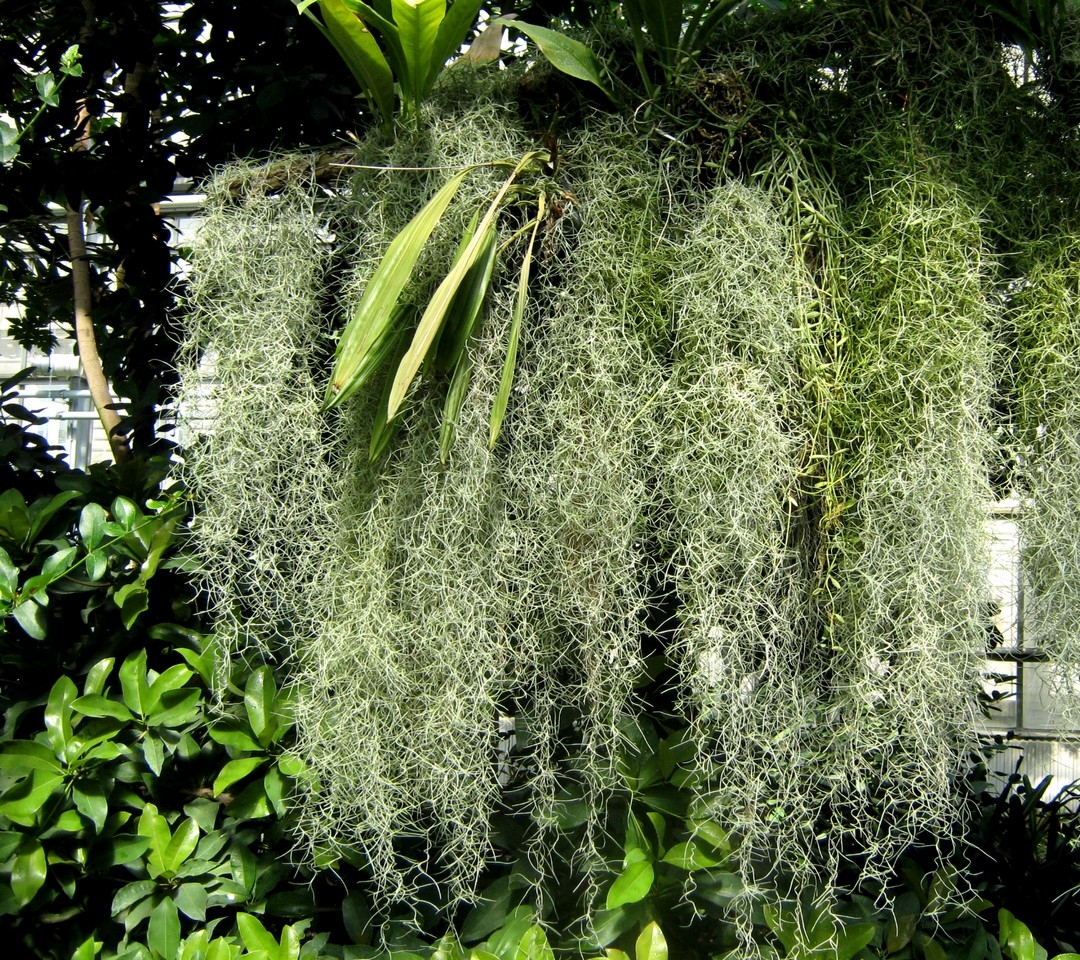
It has short shoots that are constantly formed without dying off. Clings to branches with leaves. It blooms with green-yellow flowers.
Silvery
The leaves are thin, threadlike. When exposed to sunlight, they have a silvery tint.
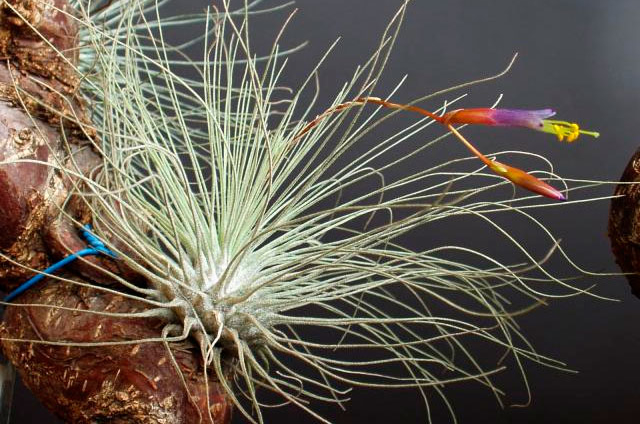
The peculiarity of the view is the thick base of the socket. It blooms with purple small flowers.
Tillandsia Xerography
It grows wild in dry areas of Mexico.
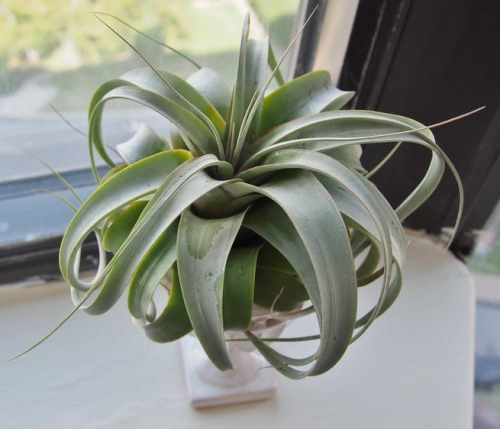
It has silvery foliage, like other subspecies of air tillandsia. Curls and grows strongly.
Bootsy
A short plant with leaves of uneven thickness. Due to their color and structure, they resemble a bundle of wires.
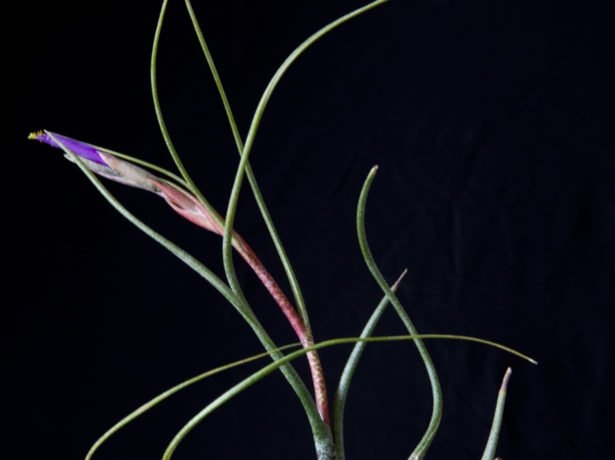
The bract is pink, the flowers are purple.
Andre
It has high decorative qualities due to the unusual, curved back leaves with brown pubescence.
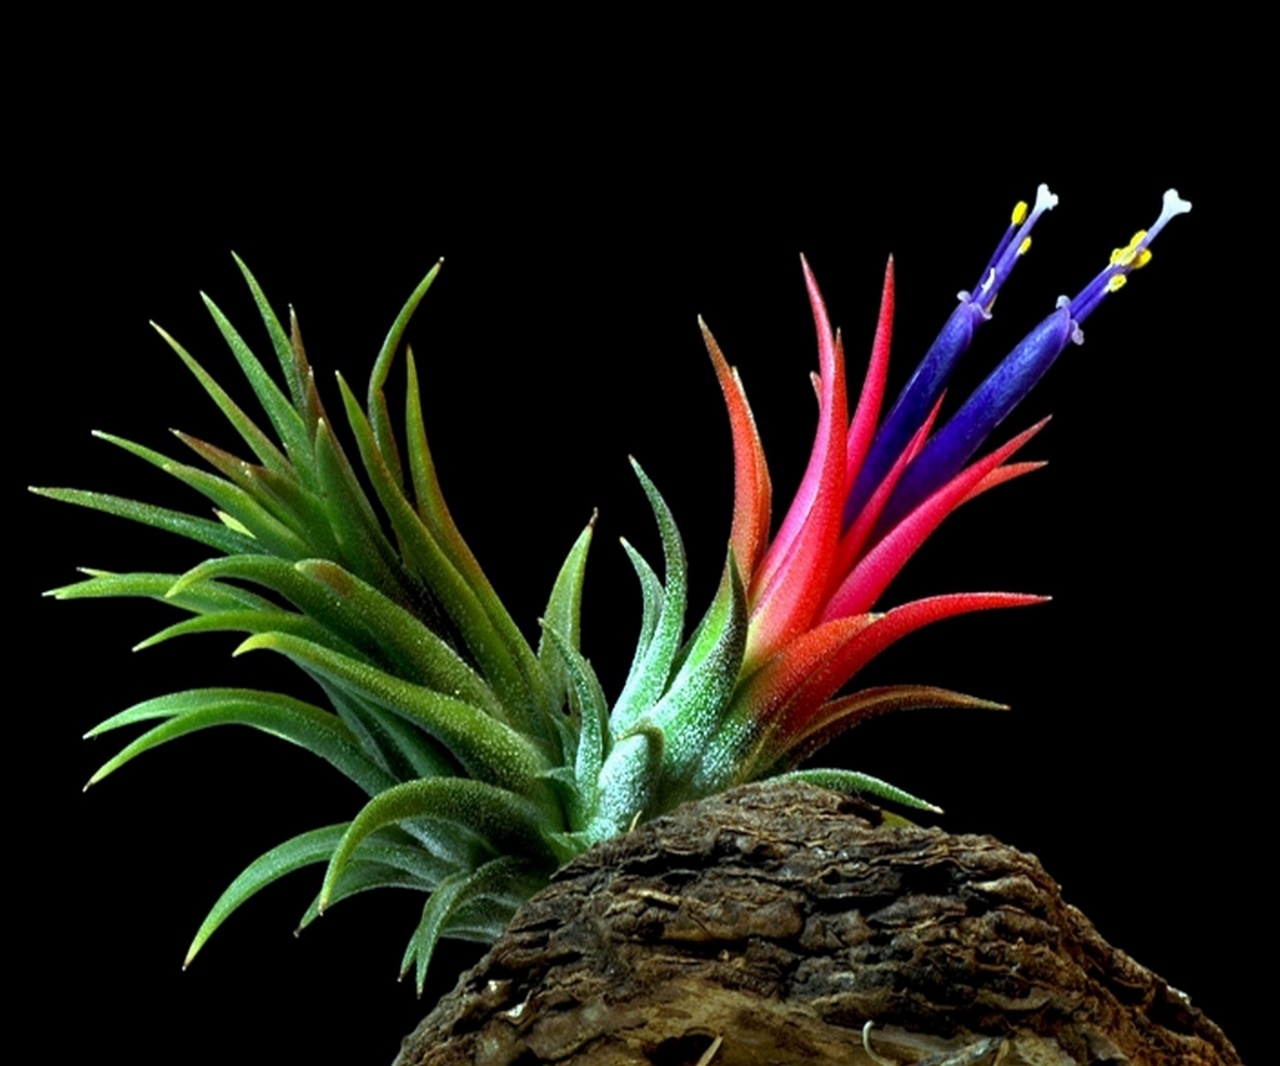
A feature is the absence of a peduncle, the buds bloom at the base of the plant.
Tillandsia sitnikovaya
Epiphyte with panicles of reed leaves, reaching a length of 25-50 cm.
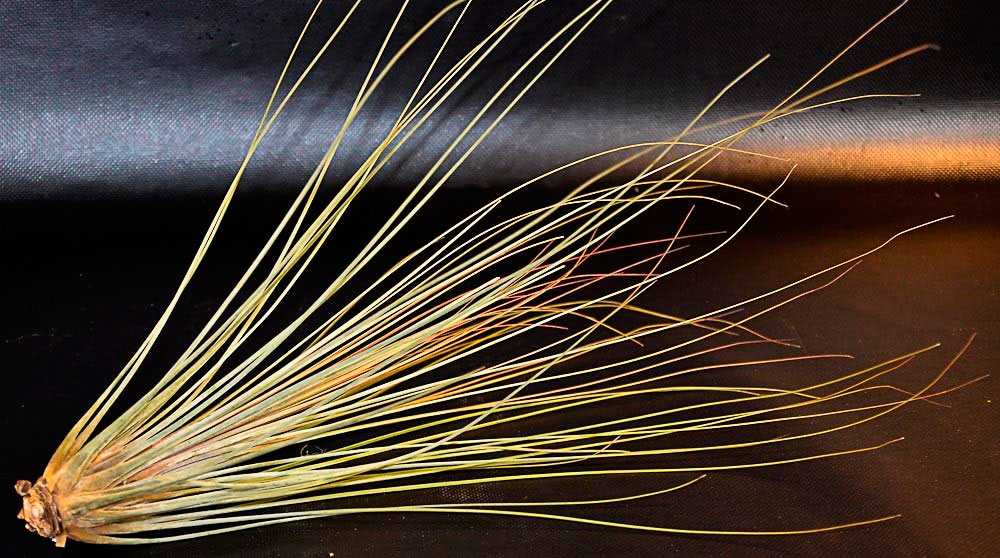
The bract is long, red, with small purple flowers.
Violet-flowered (ionant)
Leaves are strongly curved, collected in compact rosettes. In the summer they have a purple hue.
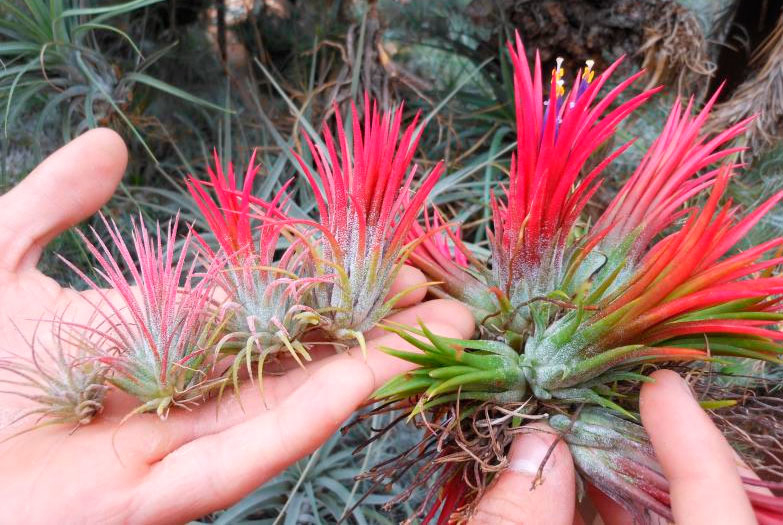
Inflorescences are spike-shaped, violet-blue.
Medusa head
The variety is often chosen for growing at home, it is hardy. It has an original shape in the form of a bulb with tight-fitting leaves, reclining in different directions.
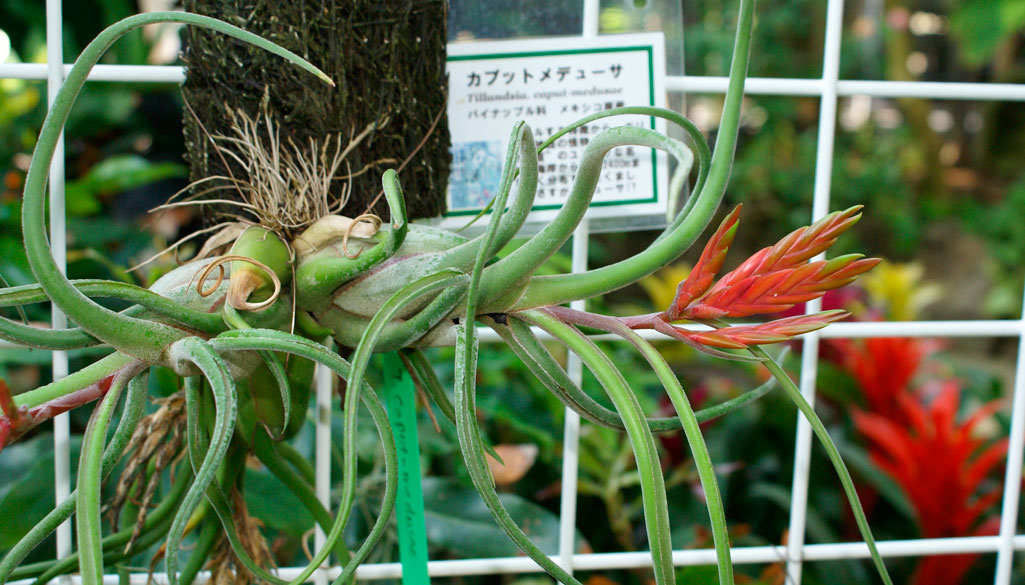
Inflorescences are red, flowers are purple, up to 3 cm in length.
Tillandsia Duera
Epiphyte with showy inflorescences and red bracts. Used for growing in a pot.
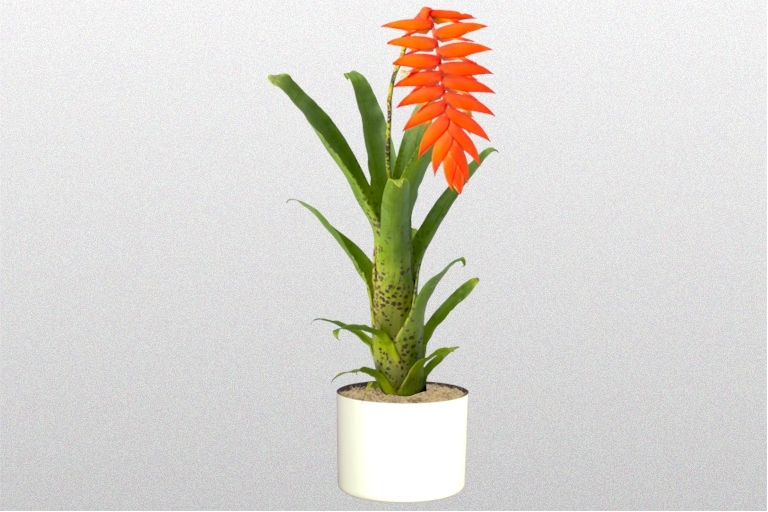
The flower has the shape of a spikelet and is attached to a long stalk.
Blue (Cyanea)
The plant is very popular, it is distinguished by the brown-red color of the base of narrow leaves, on the surface of which there are tight-fitting scales.
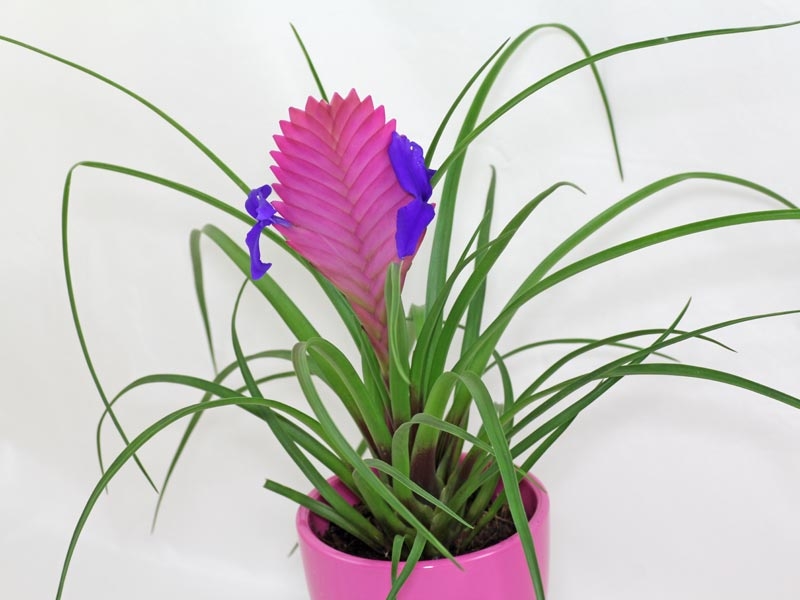
It blooms in summer, the bracts are lilac in the shape of an ear, on the edges are small flowers with a blue or pink color.
Tillandsia Lindena
Similar to the previous view.
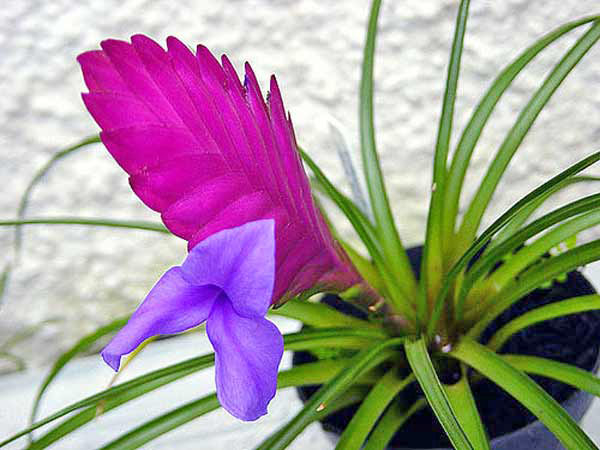
It differs in that the inflorescences are of a larger size, and the flowers are colored lilac with a white eye.
Anita
Tillandsia Anita is a hybrid derived from Cyanea. The leaves are scaly with a sharp tip.
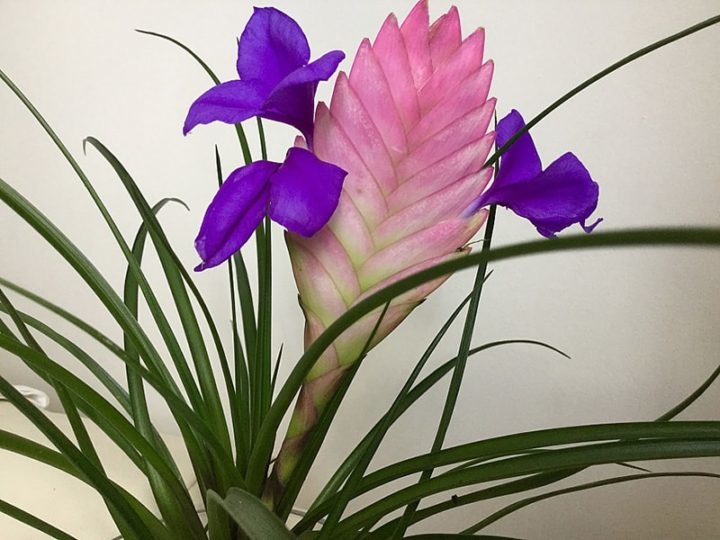
The bracts are purple, as they fade, they turn green, the flowers are purple.
Home care
There are not so many special conditions for growing plants, but they must be adhered to, otherwise the plant will hurt and will not bloom.
Conditions of detention
The living conditions differ for different groups of plants, and x is divided by the color of the leaves. The first group includes tillandsias with silvery leaves and lack of roots, the second - with green leaves (grown in a pot).
| Conditions of detention | Group 1 | Group 2 |
| Lighting | It is permissible for the plant to be in the shade, but optimally - partial shade | This variety better tolerates sunlight, but does not tolerate direct sunlight (except for the period before 10 am and after 6 pm, as well as winter) |
| Lighting depends on conditions of detention. With high humidity, the sun's rays should be more | ||
| Temperature | Tillandsia is kept at a temperature of 15-18 ° C at night, 24-32 ° C during the day. The maximum should not exceed 35 ° C, the minimum 10 ° C. The plant can be kept at 4 ° C for a short time | |
| The soil | Acidity 5.4-7.5 pH | |
| Composition: pine bark + 5% charcoal. It is allowed to use a soil mixture for bromeliads with mandatory preliminary sterilization | ||
| Humidity | Humidity should be high, acceptable - moderate. For spraying, purified water and distillate are used. From October to February - spraying is done only in the morning | |
Planting and transplanting
Tillandsia transplant is also necessary after purchase. It is produced in spring, which is why it is better to acquire a flower during this period.
If the plant was purchased during the flowering period, transplanting is impractical. It is necessary to wait for the regrowth of the lateral offspring, which will develop after its death. They need to be transplanted into separate pots.
Soil preparation
The transplant rules for a non-flowering potted plant are as follows. The soil consists of large fractions of 1-2 cm in size. Mixtures with fibrous particles are not suitable. Even specialized soils for bromeliads cannot always meet these conditions.
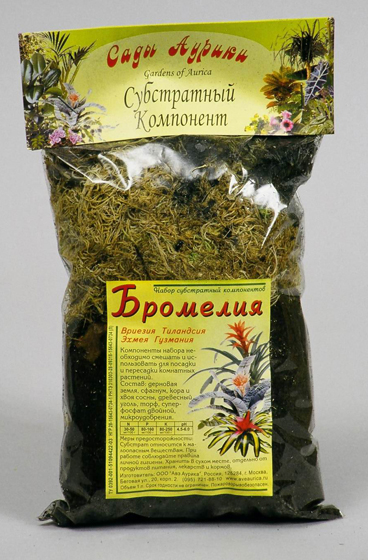
The soil should be free of peat, earth, humus. They lead to root decay. Pieces of bark mixed with stones are used as soil. Coarse fractions provide optimal air access for the roots.
Pot selection
A small container with a diameter of about 10 cm is suitable. It is important that the pot is stable. Charcoal is used as drainage, it helps to protect the plant from root rot.
Transplant principles
The plant needs roots to absorb moisture from the air and droplets flowing down the leaves. Therefore, when transplanting, there is no point in being afraid to damage them: if necessary, the plant will quickly grow new ones.
Therefore, when transplanting, tillandsia is completely cleared of soil mixture and placed in a larger pot at the same depth. To comply with this condition, you need to take it with your fingers on the ground, turn the pot over and pull out the plant. When planting in a new pot, put your fingers in the same place.
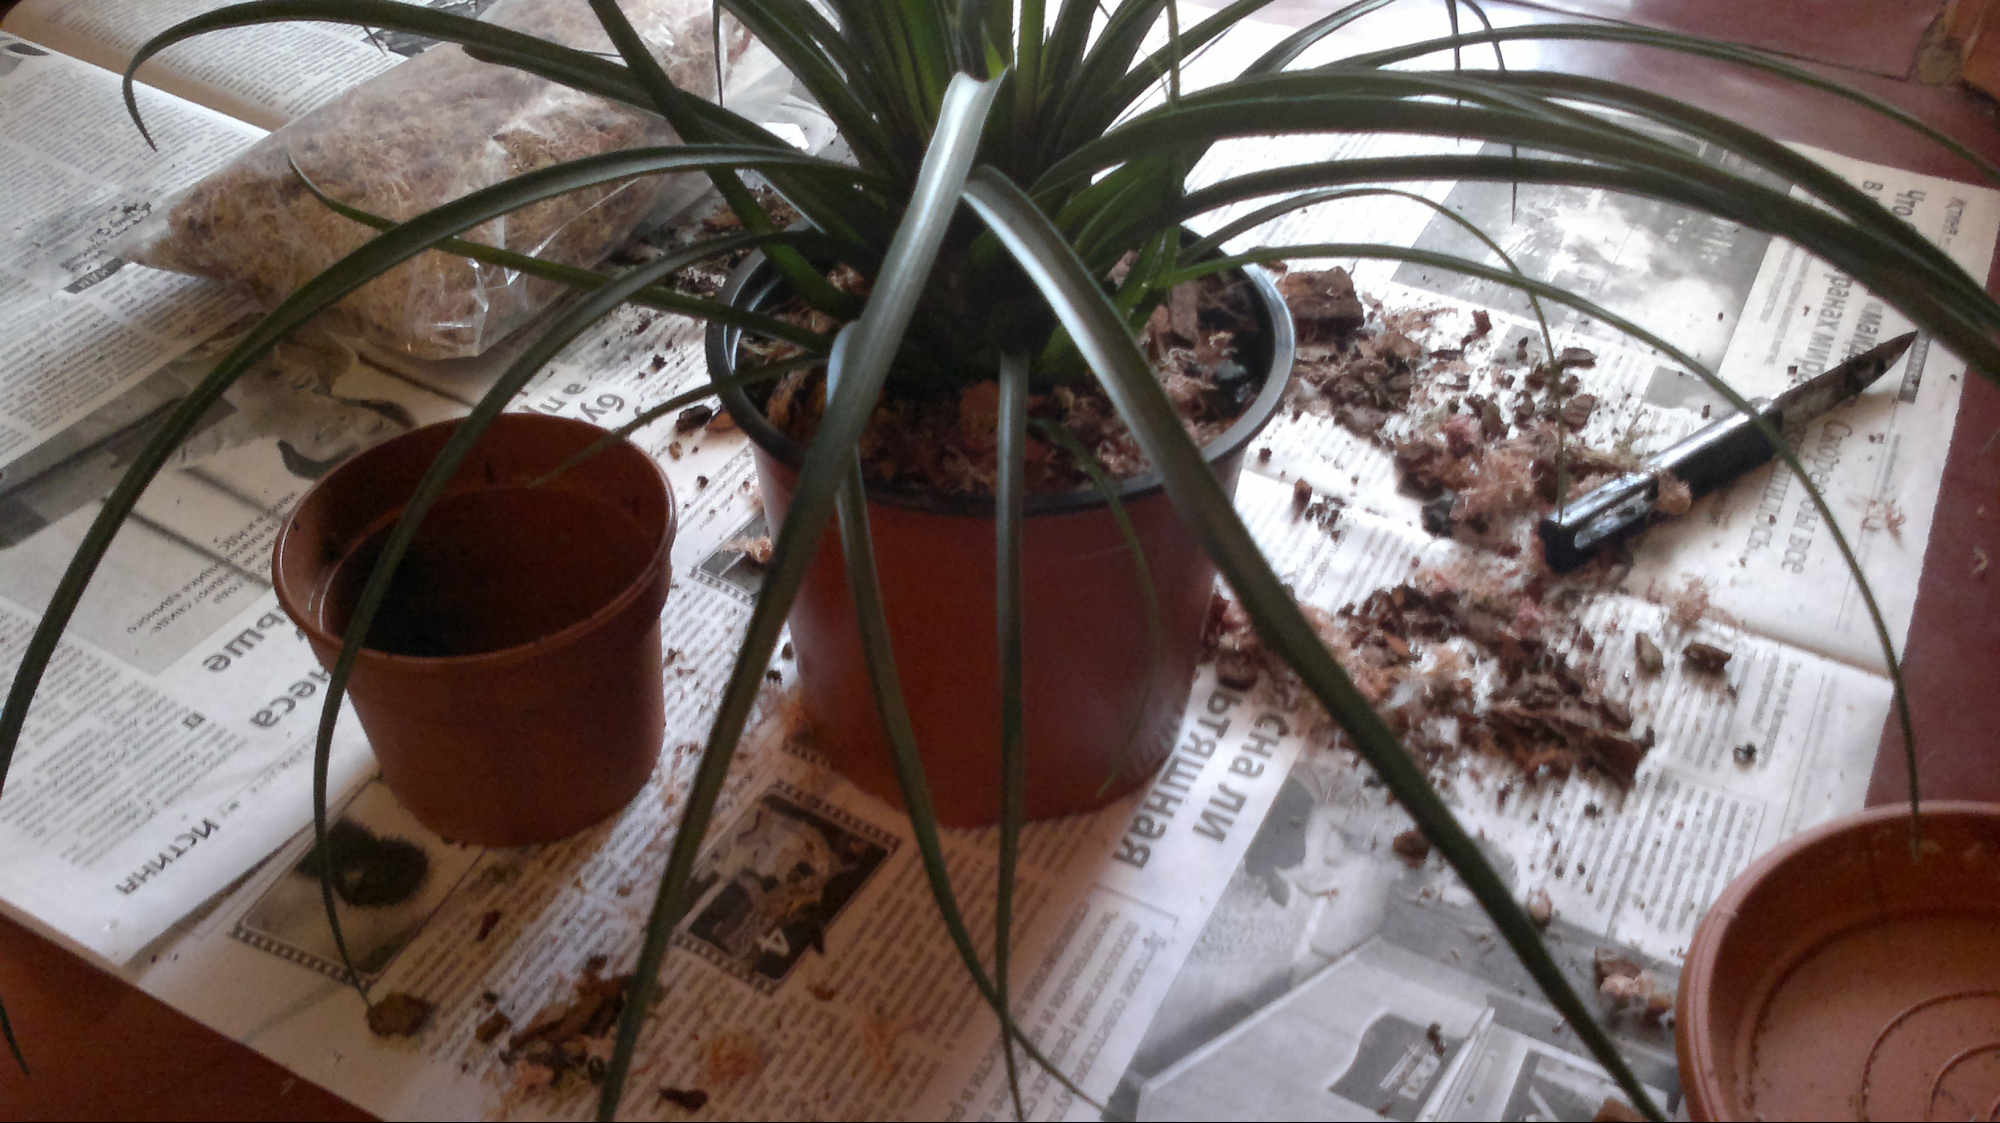
The flower is watered with warm water from a spray bottle inside the socket or by immersing the pot in water for 20 minutes.
Transplanting an atmospheric plant
Atmospheric varieties do not require soil. For attachment, driftwood, felt or untreated wood are used. Do not use materials coated with various chemicals, paints, etc.
Flowers purchased from the store on a stand are not transplanted. Only children who grow up are deposited.
Planting stages:
- Choice of stand. The most attractive solutions: pieces of wood, fragments of branches, vine baskets. It should be borne in mind that the place with the stand will have to be immersed in water. It is necessary that it penetrates inside and quickly glass.
- Choice of location. Pieces of wood are suspended from the wall with wire, which is fixed in the hole made.
- Tillandsia is pressed against the stand with the root collar, inside the root. A soft coconut fiber pad is placed between it and the stand.
- The plant is fixed with a soft thread.
- After fixing, the tillandsia must be sprayed with a spray bottle.
You cannot change the location of the flower, rotate it or replant it only if you no longer like the stand.
Landing in the florarium
Since the plant needs high humidity, you have to constantly spray it, install a humidifier or indoor fountain nearby. This is not always convenient. It is much easier to plant it in a florarium, where the necessary microclimate is maintained all the time - glass gives diffused light and condenses moisture.
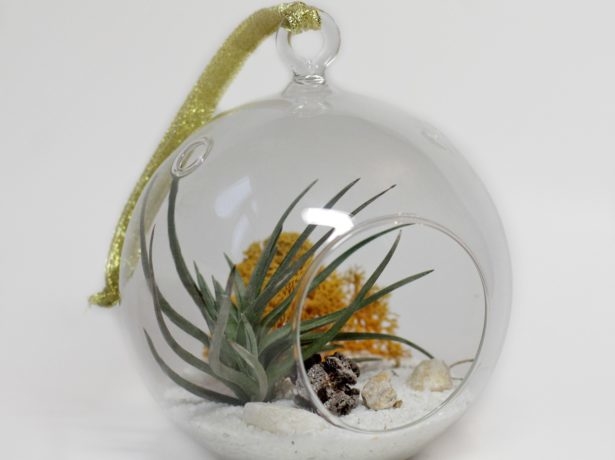
Planting stages:
- Choosing a suitable container. There must be transparent walls, you can choose plastic or glass containers: glasses, candy bowls, vases, aquariums, terrariums, etc.
- The choice of material. Broken clay shards, pebbles, shells are used depending on the theme. If tillandsia is attached to wood, charcoal is also suitable for drainage. The latter is best added to any florarium to protect against fungus.
- After planting, the plant is watered or sprayed.
Do I need support
For most varieties, no support is required. Atmospheric tillandsias are assigned to interior items. The rest are grown in pots.
Exceptions are plants with hanging stems. They use a straight support to grow in this way.
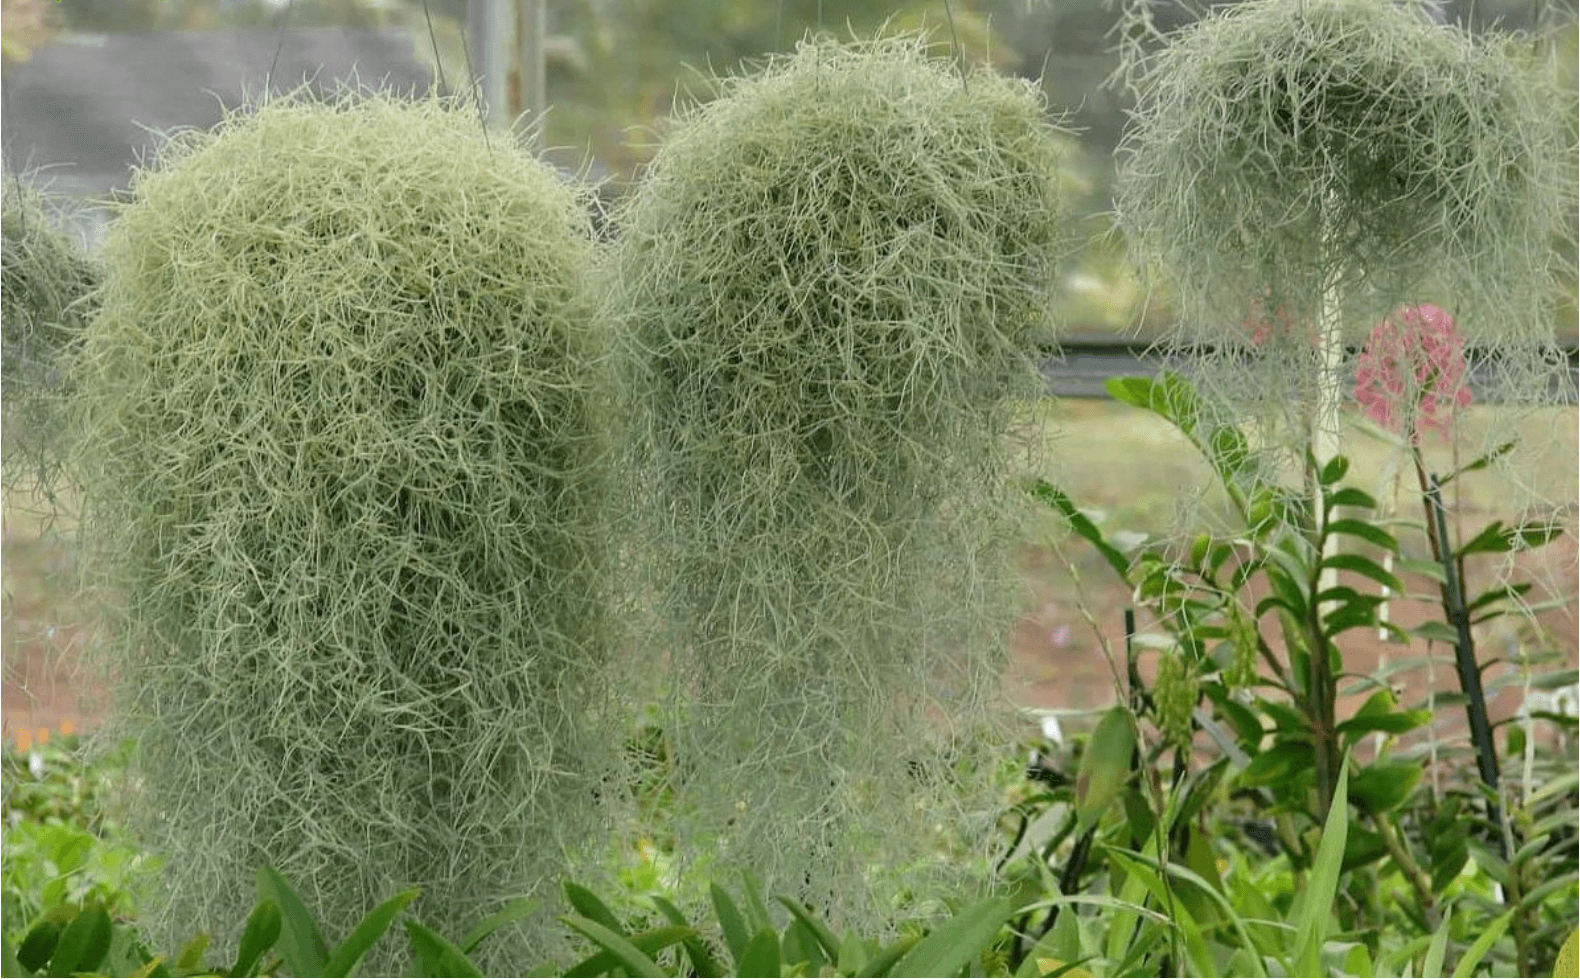
Sometimes supports are used for the first time for children, until the latter get stronger.
Watering and feeding
Water is poured into the outlet of plants (rainwater and purified). Distilled water is unsuitable for irrigation, like tap water, due to the plant's sensitivity to chlorine. Temperature - not lower than 20 ° C.
The lower part of the plant is sprayed once a day. The soil should be moist, slightly dry in winter. Do not allow water to drain from the leaves.
If it is impossible to achieve optimal conditions of maintenance (lack of lighting, low temperature), then water the plant less often, but continue to spray the leaves. Watering the plant from the shower is carried out twice a month. Its purpose is to wash the sinuses from the dirt.
Tillandsia has a negative attitude towards excess moisture. Within 4 hours, the drops should evaporate from the leaves, and excess water from the pan and pots should be removed.
Fertilizer
Top dressing is done once every 6 weeks. Special mixtures for bromeliads are used. Concentration - 25% of the recommended on the package. It is important that the finished mixture is free of copper and boron. Top dressing is done from September to March.
Flowering period
Flowering occurs once, at 2 or 3 years of age. After that, all the power of the mother plant goes to the formation of children, which leads to its death.
During flowering, tillandsia looks very beautiful and exotic. The buds open one after the other, so the total duration of this period can reach several months.
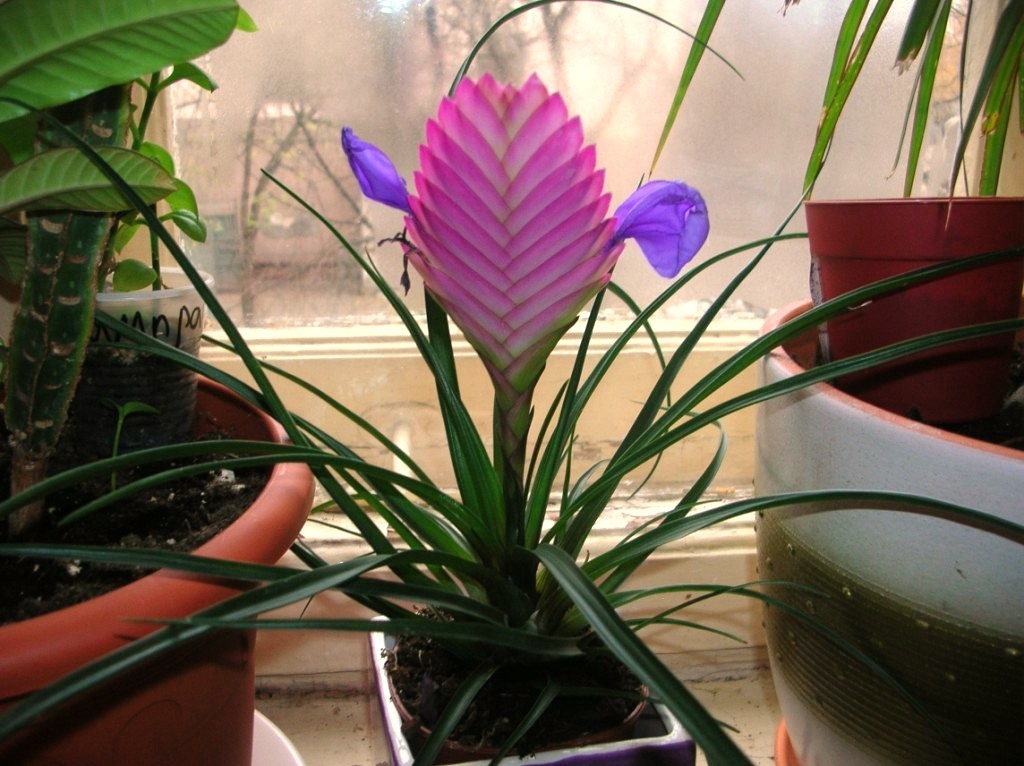
After the last bud wilted, the peduncle retains its decorative effect. It can be left or cut, the mother plant will die anyway. One tillandsia gives 3-8 babies, from which flowering is expected in a few years.
Does tillandsia have a dormant period
After the onset of cold weather and a reduction in daylight hours, the plant naturally goes to rest. Usually it is not very pronounced, with the exception of a few varieties of tillandsia.
During this period, it is important to remember the maximum temperature of the content. The plant does not tolerate cold and drafts, so placement on a window with a window is not suitable for it. When transferring a flower inside the room, it will be necessary to illuminate with a phyto lamp. Spraying, humidification is carried out more often due to a decrease in the relative humidity of the air during the heating period.
Formation
Tillandsia's life cycle is short and the flower itself is very compact, so it rarely has extra whiskers, shoots and leaves.
Trimming of the peduncle is allowed, but this does not play a special role, since the mother plant dies. Instead, a few young outlets remain, which they continue to look after.
How care errors manifest
If the rules for caring for tillandsia at home are violated, the plant gets sick. The main errors appear as follows:
| Problem | Cause | Decision |
| There is no flowering, the plant rots and dies | Unsuitable soil | Change the ground or support. If there are children, separate them from the main plant, transplant them into other containers. Do not use fungicides for decay, they are absorbed into the bark for a long time. Throw away the old support and the pot on which there is a fungus. Purchase new ones, which must be sterilized before use |
| Excess moisture | ||
| Excess fertilization | ||
| Lack of flowering | Insufficiently high temperature, its drops | Move to another place, if necessary, arrange backlighting. If in a warm season the temperature does not drop below 18 ° C, it is allowed to put on the balcony |
| Lack of lighting | ||
| The tips of the leaves turned brown | Hard water or insufficient watering | Observe the conditions of irrigation and humidification, the water is used filtered, settled, the temperature is about 20 ° C |
| Leaves curl | ||
| Leaves are covered with wrinkles |
The most common diseases and pests
Most species are disease resistant. The following problems are rare.
| Disease or pest | Signs | Prevention and control |
| Leaf spot | Fungal disease, the mycelium is located on the plant and in the ground. It manifests itself as blisters, which are replaced by dark spots | Today there are no ways to fight. The plant must be destroyed. Prevention is to ensure proper care: humidity, light and temperature. If one or two sheets are damaged, they can be removed |
| Bromelium scale | A brown insect that sticks to a leaf. Above you can see the wax carapace | It is removed with a wooden stick, the leaves are washed with soapy water with a soft sponge |
| Mealybug | It parasitizes stems and roots. May produce a gray-white waxy coating. The plant becomes covered with spots and wilts, growth stops | Treated with cypermethrin insecticide |
| Spiderweb | Leaves become discolored, marbled, shrink and fall off | They use insecticides with acaricidal action. With the help of a spray gun, all parts of the plant, the pot and the ground are treated. The next day, the flower is examined, if there are signs of infection, further processing is carried out every 9-10 days at a temperature of 20 ° C or every 3-4 days at a temperature of 30 ° C. 3-4 treatments required |
How to propagate tillandsia
Since the plant dies after flowering, the issue of reproduction becomes very relevant. The easiest way to do this is to divide with the help of children.
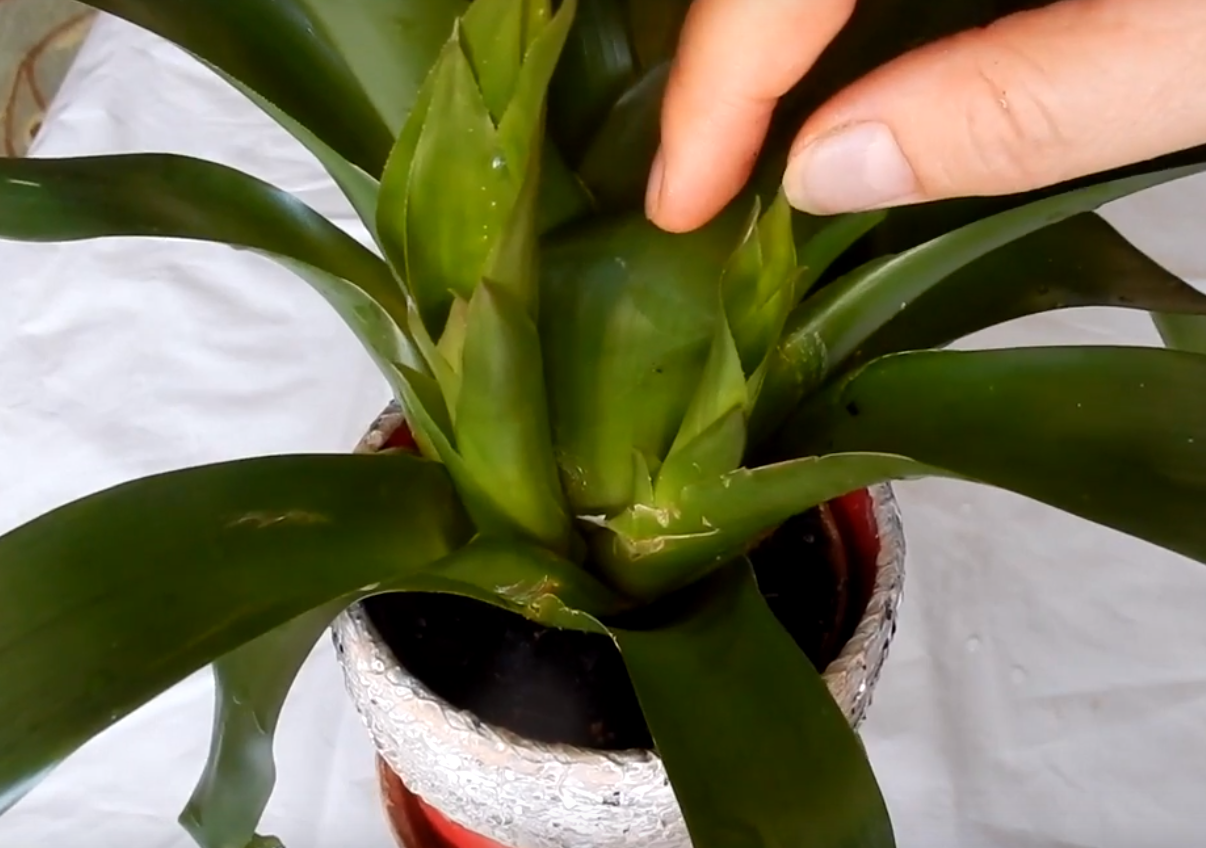
Even before the end of flowering, babies appear at the base of the mother's outlet. To separate them, the pot must be removed, the roots must be completely cleaned from the soil and the lower leaves must be torn off.
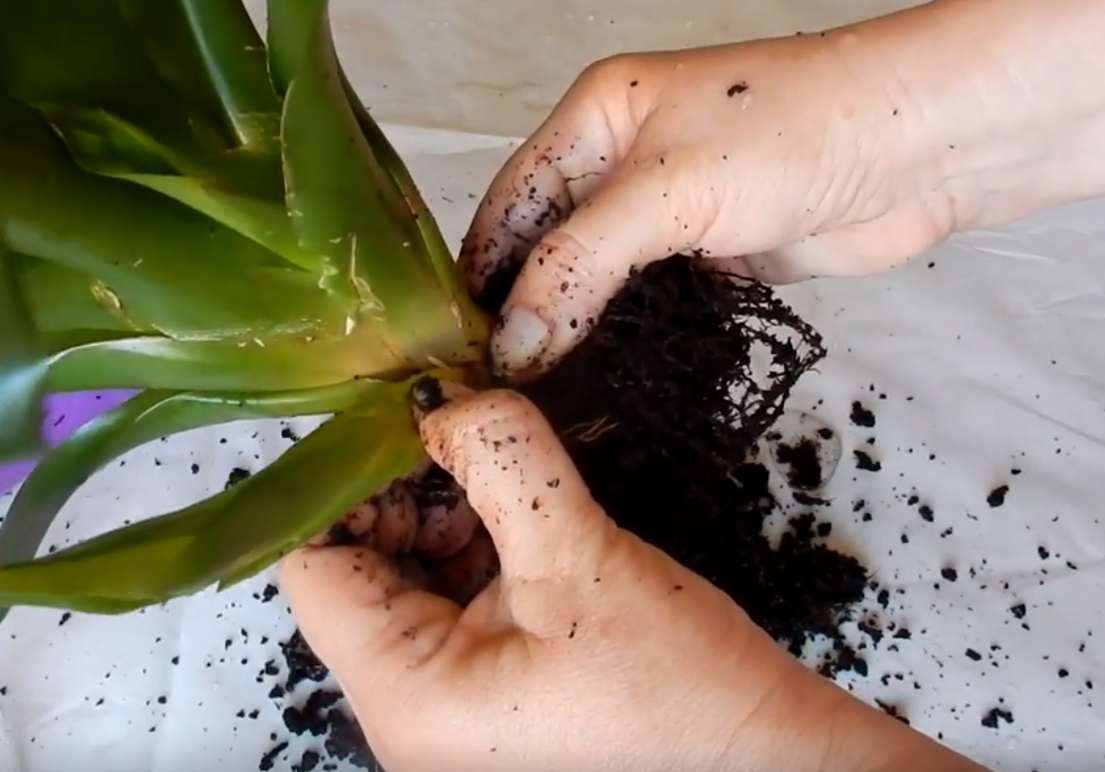
After that, separate the baby and transplant it into your own pot.
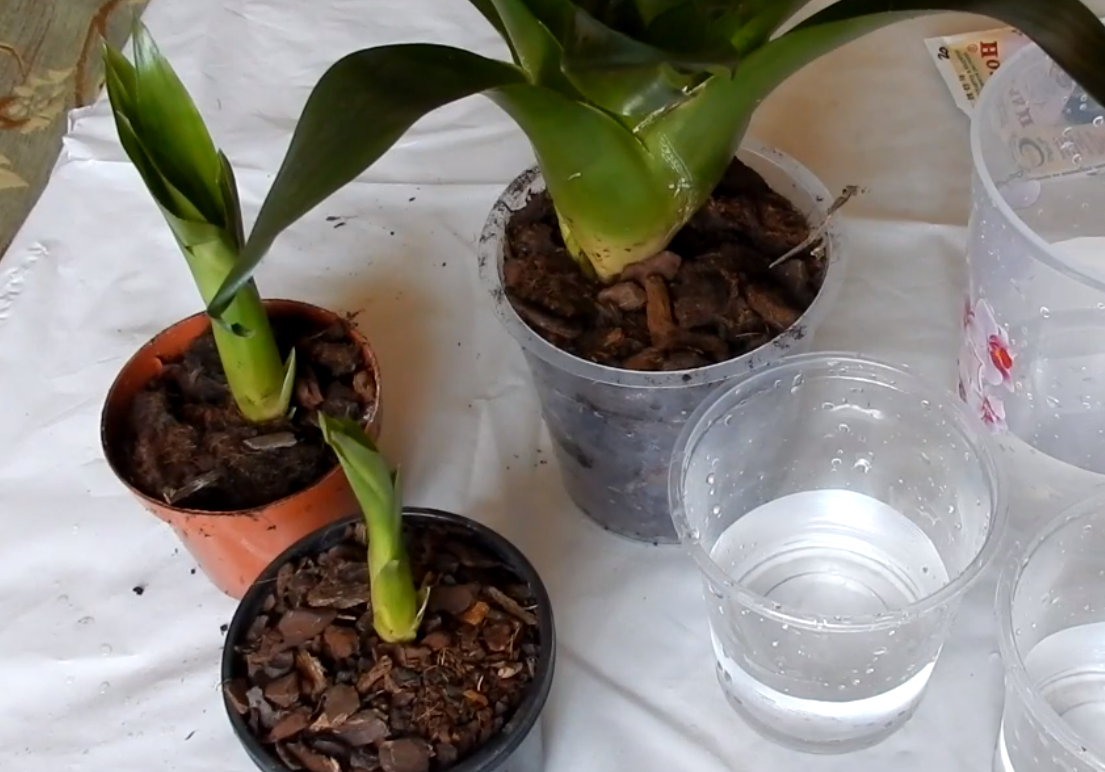
An air-type plant is simply enough to divide and transplant each separately.
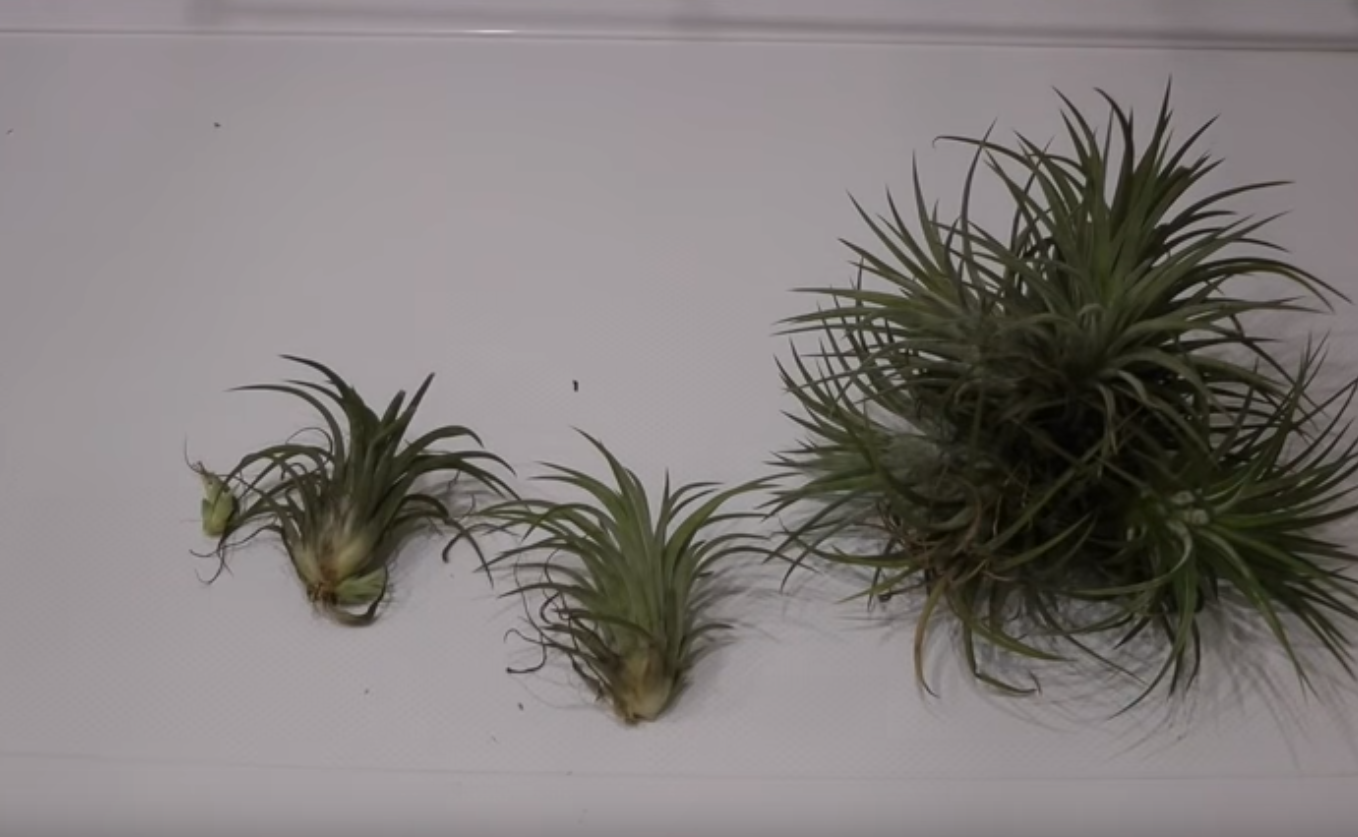
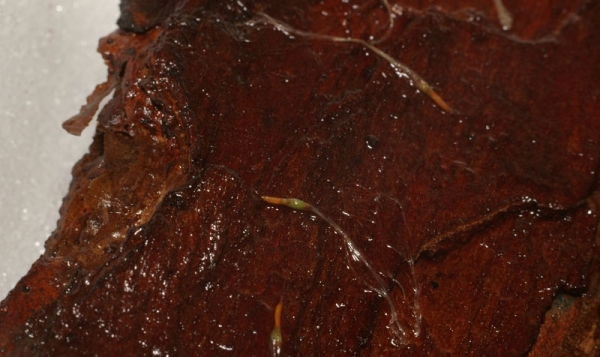
Growing from seed is considered more difficult. There are several options. Seeds are placed on the surface of the bark and sprayed abundantly until shoots appear. After the plant has matured, it is transplanted.
Another method is planting in a sand and peat substrate. The seeds are laid on its surface and slightly sunk with your fingers. After that, a greenhouse is formed. It is important to maintain optimal lighting and temperature. The film is removed daily. The sprouts are transplanted when they reach 10 cm.
Many gardeners complain that the seed growing process is very difficult. Seedlings are weak, and most of the seedlings die.
Before purchasing tillandsia, you should weigh the pros and cons regarding the conditions of detention. It can be difficult to keep them, but if you do this, the flowering will be long and beautiful, and the plant will delight a large number of children.
