It would seem that with the onset of autumn, the garden begins to slowly fall into hibernation, and gardeners can forget the continuous worries about the land, fruits and berries until spring. But it was not so - the last leaves, fallen from the grapes, remind that the vines need pruning. There comes a favorable moment for those who wish to expand the area of their vineyards or grow their favorite variety of the neighbor's Lady's finger or the unpretentious Codryanka. This is the time to harvest cuttings for propagation from cut vines.
Content
Autumn is the most favorable time for harvesting grape cuttings
Grape propagation material is harvested in autumn and then stored in cool conditions during the winter. The article will discuss the rooting of cuttings (shanks), which are harvested during the autumn pruning of the vine. The most suitable season for these works is the season after the fall of foliage - the end of October or the beginning of November. It is important not to delay the pruning process before the onset of frost.
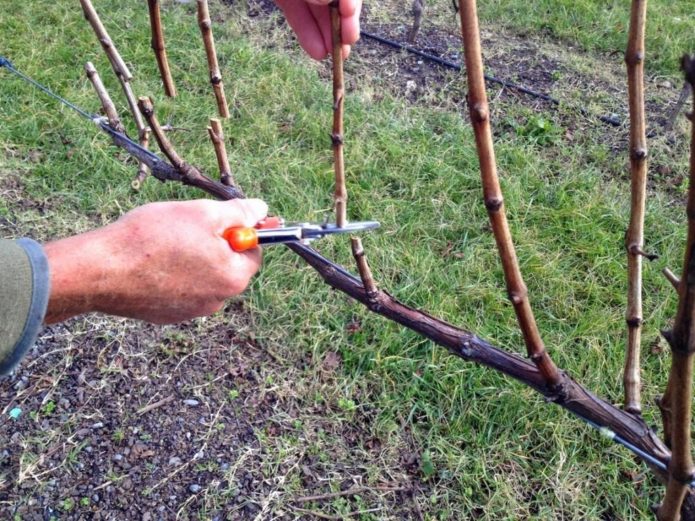
Like any plant, grapes have a growing season and a dormant period. Autumn is the time of transition from one period to another. At this time, vines are pruned, including for harvesting cuttings:
- For the continuation of the species, strong, healthy, fruiting vines with a diameter of no more than 8–10 mm are selected. Sick and frail branches are not suitable for storage and further reproduction - it is advisable to burn them or take them outside the land plot.
- Selected vines are cleaned of dry leaves and other debris.
- Cut into pieces of the desired length - 20-50 cm, with 3-4 buds. Too short stems will not gain enough strength for germination, and long ones are poorly stored.
Winter storage
Prepare cuttings for storage in a cool place (from +1 to +5 aboutC) in this way:
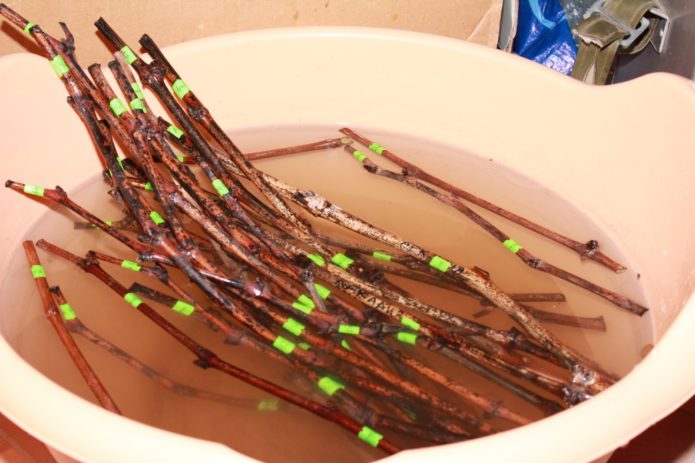
- Cut untreated shafts are soaked in water for a day. After they need to be slightly dried from excess moisture. Do not leave soaked cuttings warm for more than a day, as this can provoke premature evaporation of moisture and awakening of the kidneys.
- Then the cuttings are wrapped in a damp newspaper or cloth, over which they are wrapped in a plastic bag, providing for a slight air supply.
- The cuttings wrapped in this way are sent to the cellar, refrigerator or balcony. You can dig them into the ground to a depth of 20–40 cm, additionally covering them with branches, rags, sand or any available insulation.
The chubuk is then allowed complete rest in a cool place until early spring.
Alternatively, you can keep the vine in the basement, and in the spring you can cut it into shafts of the required length 1-2 days before planting.
Video: how to prepare and in what conditions to store grape cuttings
Preparing cuttings for germination
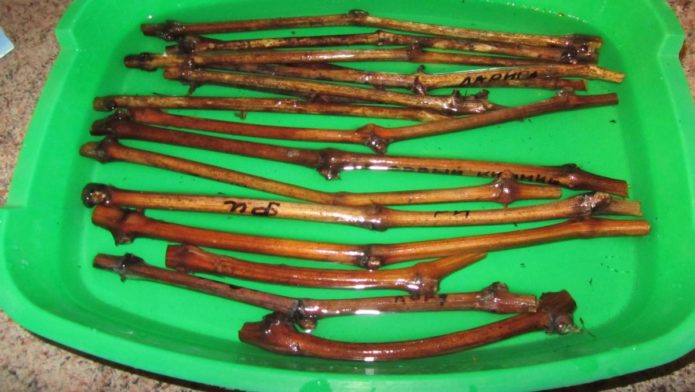
The most favorable season for rooting grape cuttings is the end of February in warm regions and March-April in regions with cooler climates. At the end of February, physiological dormancy ends, the cuttings are taken out of the cool storage, updating the sections and examining the state of the kidneys. Sick and damaged cuttings are rejected, as too thin or too thick planting material will not bring the expected result. For a beginner, it is important not to be mistaken in determining the top and bottom - the bud originates in the leaf axil, on the cutting the place under the bud from the fallen leaf will point to the lower end, which will subsequently form the root. If it is difficult to determine the top and bottom, immediately after trimming, draw an arrow in the desired direction with a marker. In order not to get confused in the varieties, you can sign their names directly on the cuttings.
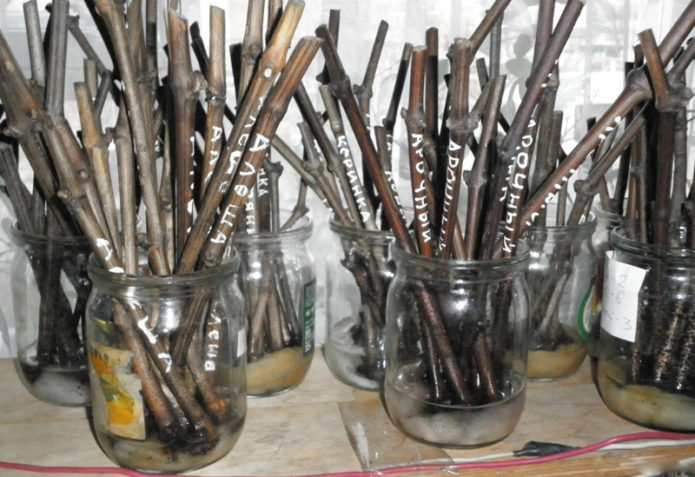
It is necessary to sign the names of grape varieties on the shanks so as not to get confused in them
Soaking cuttings and stimulating root formation
Before you start germinating stems after hibernation, you need to saturate them with moisture. To do this, carry out the following actions:
- Use a sharp knife or pruner to update the slices.
- For several days, the cuttings are soaked in a basin, bucket or similar suitable container. This will saturate dried or frozen plants with water. It is desirable that the shanks are covered with water 1–2 cm or more. Melt or rainwater is a more suitable medium for root formation than the usual chlorinated water from the mains.
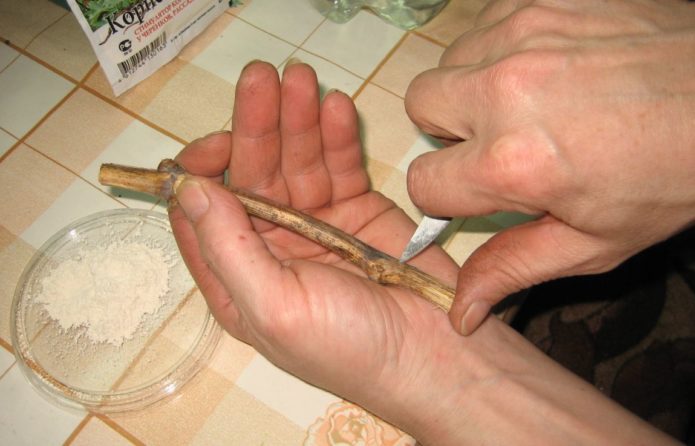
- To improve root growth, you can add an agent to stimulate root formation to the water: Humate, Epin, Kornevin, Yuka, Heteroauxin, or any other that has similar properties. When adding stimulants, carefully read the dosage instructions on the package.
- Cutting with a sharp knife at the lower end of the cutting also further promotes root formation. To do this, the horizontal upper cut is dipped in melted wax or paraffin (some growers use garden varnish instead of wax), being careful not to catch the kidney. This protection will prevent moisture loss during germination.
- Before germination, it is advisable to carry out the kilchevaniye procedure, in which unequal temperature conditions are created for the upper and lower parts of the cuttings: heating the lower part accelerates the development of roots, while the cold does not allow the upper bud to wake up prematurely.
Preparing the soil for germinating cuttings
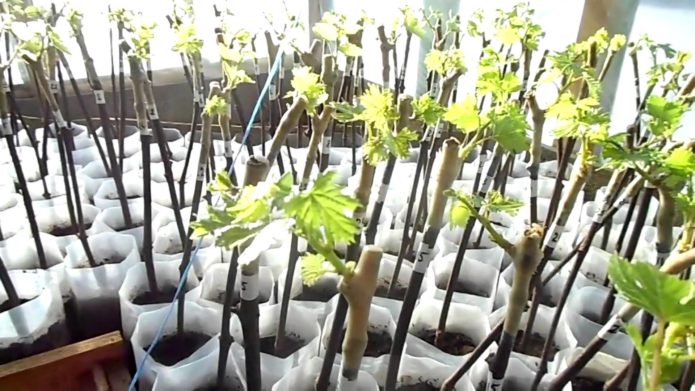
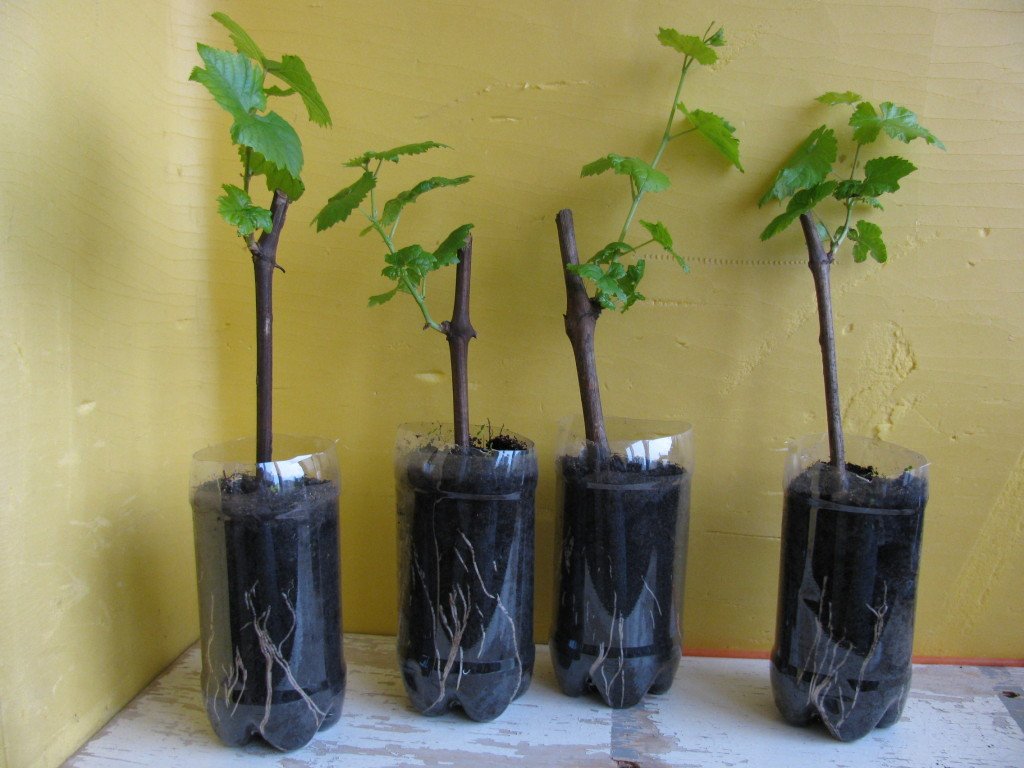
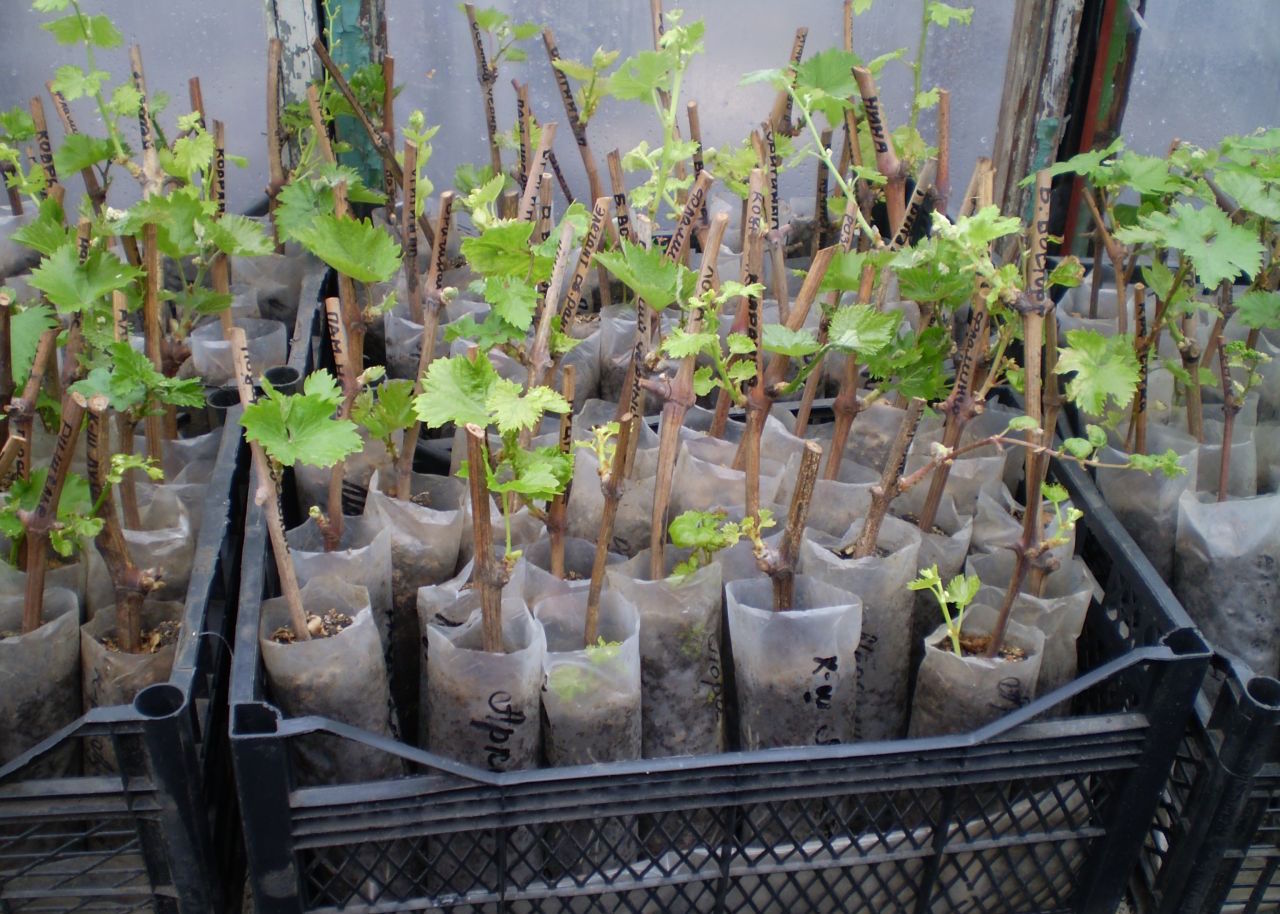
Old pots, half-liter plastic cups, or cut plastic bottles are perfect for sprouting stems in the ground. When the procedure for examining the planting material after the winter rest is carried out, the cuts on the bark are light green and the presence of droplets on the sections is traced, it is time to prepare the soil for planting. First, it is necessary to disinfect it as much as possible, for which purpose it is calcined in an oven or in an oven on a metal baking sheet. By the way, at the same time you need to pour some sand - it will be needed as a small drainage pad directly under the root itself.
To germinate grape shanks in the ground, carry out the following manipulations:
- Pour some small pebbles or gravel at the bottom of the container, add calcined earth with the addition of organic fertilizer.
- Make a small depression-bed, in the middle of which pour some sand.
- Place the stalk in a moistened hole so that the lower bud is almost at ground level, and the upper one only slightly extends beyond the border of the glass or bottle.
- After that, moderately compact the soil and water.
- Place the cuttings prepared in this way in a warm and bright place.
Subsequent care consists in timely watering and loosening of the earth.
If you wish, you can cover the cuttings on top with cups without a bottom - this will provide an additional greenhouse effect and improve conditions for root growth.
Germinating grape cuttings at home
The sprouting process at home turns into an exciting activity if no twig that has been rotten or dried over the winter darkens the eyes of a caring owner. Experienced growers with many years of experience completely rely on intuition, but amateur beginners still need to reject a lot of cuttings while they learn to distinguish a ripe vine from a green unripe shoot by eye. At home, it is not difficult to germinate cuttings in water or, for example, in sawdust.
Germinating cuttings in sawdust
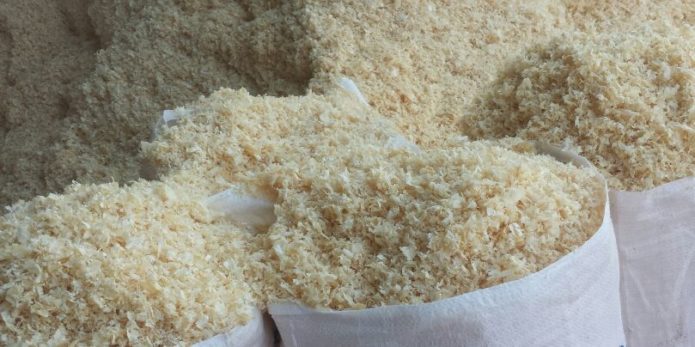
The process of growing cuttings in sawdust is considered to be less time consuming and most efficient. The survival rate of cuttings is almost 100%. Rooting in sawdust surpasses in quality even the growth of roots in soil mixtures. Only deciduous tree species are used for sawdust: alder, poplar, willow. Waste from the processing of chipboard, fiberboard, etc. is not used, as they contain harmful chemicals.
After the winterized cuttings are brought into the room and placed in water at room temperature, they begin to process the sawdust. The procedure is as follows:
- Fold the sawdust into a container with a volume of 20-30 liters, pour boiling water over and leave to cool completely.
- The mixture is washed in the same container, cleaned of large sawdust and other debris, the water is drained.
- Fill with wet sawdust plastic bags pre-fitted to the length of the cuttings.
- The cut stems are placed in bags with sawdust so that the upper ends protrude 2 cm from the bags, while the sawdust should adhere tightly to the grapes.
- The bags are installed in a tank or pan on a raised platform (stones or timber) so that it is possible to take water that will drain from the bags to the bottom of the container after daily watering.
This technique provides the sprouts with ideal humid-air conditions and after a few days the bud begins to bloom, and after 13-15 days a branch forms. Once a week, together with watering, fertilizing is applied: 1 teaspoon of nitrogen, phosphorus or potassium fertilizer per 3 liters of water at the rate of 250 g per plant. After 2 months, young roots of grape seedlings are clearly visible through the polyethylene.
Germinating cuttings in water
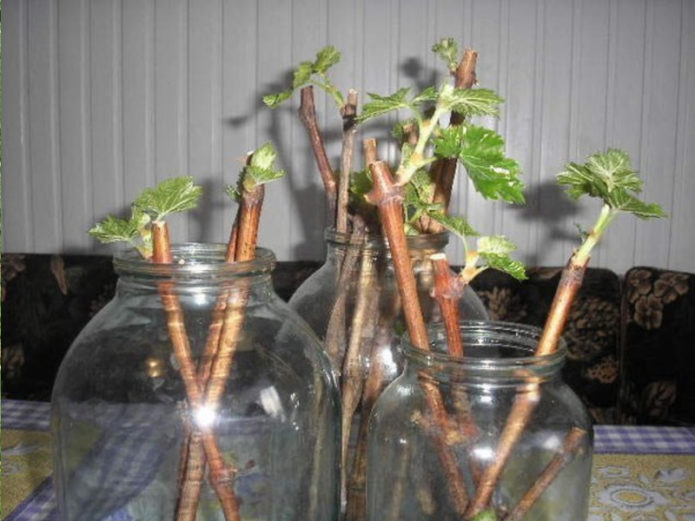
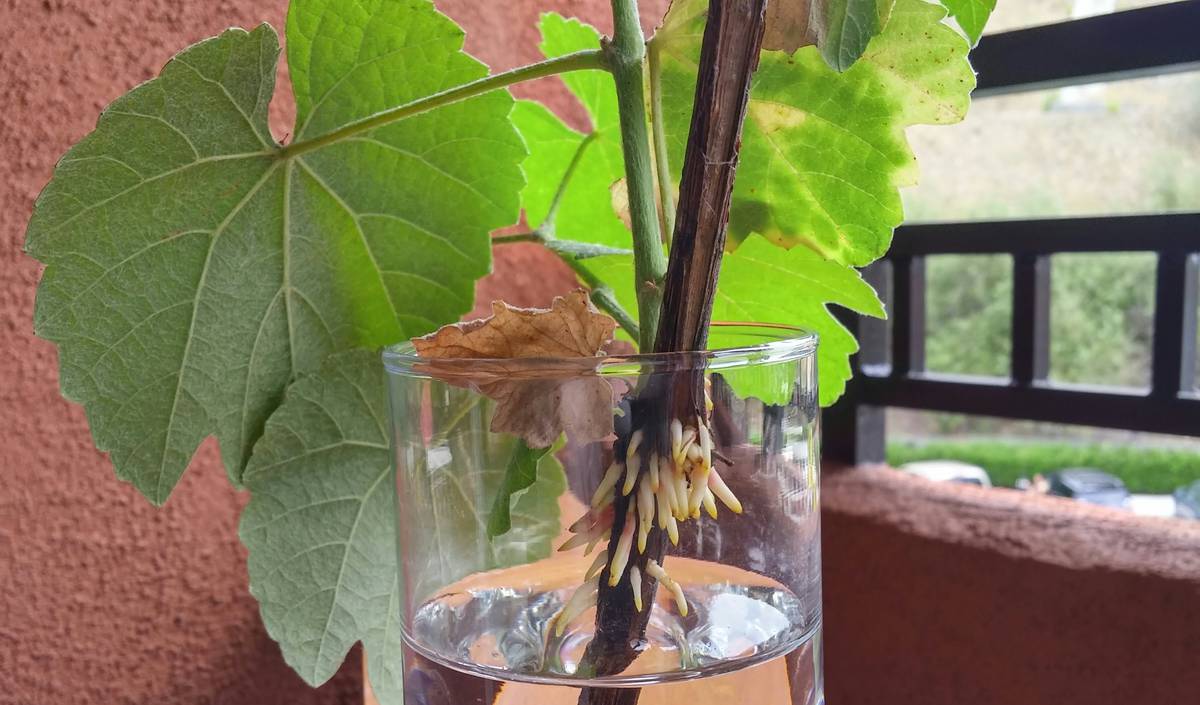
How many times in childhood we broke a twig and put it in a glass of water, then watched with interest the opening of delicate buds and the growth of thin hair-roots in the water. At first glance, it seems that there is nothing complicated about it. But each business (and viticulture is a serious industry) has its own subtleties. A few simple tips will help increase the percentage of germination of planting material in water:
- the water in which the seedlings stand cannot be completely changed, but only gradually topped up if necessary;
- the water temperature should be 20-22 aboutC, and the one into which it is poured, and the one that is poured;
- There should not be many shanks in the jar: no more than 3 pieces per glass of water;
- excess water leads to rotting of the cuttings;
- the addition of several tablets of activated carbon or a teaspoon of phosphorus-potassium fertilizers will accelerate the development of roots;
- aeration procedure will reduce the likelihood of material decay.
Subject to these tips, the method of water rooting will be simple and accessible to every summer resident. Just follow the sequence of actions:
- Lay a layer of cotton wool 3 cm thick on the bottom of the glass jar, fill with water 2 cm above the cotton wool.
- Add potassium permanganate crystals to the water (until the solution is light pink) or a teaspoon of wood ash.
- Place the prepared cuttings in a jar. If there is more material than the container can hold, use several cans. Of course, the shanks should be spacious there.
- Place the jars in a warm place, but not near heaters or stoves.
- To improve root formation, create a greenhouse effect in your “nursery” by wrapping it on top with plastic bags.
Depending on the grape variety and the state of the cuttings after wintering, in a week or two you will be able to observe the awakening of the first buds, and in another 10–20 days the first roots will appear. However, sometimes the roots appear only after 1.5–2 months.
It is important to add water to the jar on time in order to avoid drying out future seedlings. If this happens, absorbent cotton wool will keep them comfortable for a while.
Video: how to germinate grape cuttings in water
Problems with sprouting shanks
Unfortunately, everything does not always work out correctly and smoothly. At every stage, from the autumn pruning of the vine to the appearance of roots, a problem may arise that will nullify all six-month efforts. The most common problems when sprouting stems:
- the eyes come to life, but the roots are absent;
- sometimes there is a root, but the revived shoot disappears, and it happens that it does not show any hope and signs of life at all, despite proper care and anxious care.
Such situations happen solely due to our ignorance or due to wrong actions.
Let's consider some possible mistakes that lead to the lack of vitality of grape cuttings:
- waterlogging during storage can cause decay or decay of grape cuttings;
- non-observance of the correct temperature regime:
- if the room temperature exceeds 30 aboutC, the growth of roots stops or does not occur at all, calli form on the cuttings (growths on the sections);
- temperature below 12 aboutC does not allow the eyes to grow well with developing roots;
- too dry air in the room will lead to the fact that the tops of the cuttings will begin to dry out - here you will definitely not wait for the buds, the shanks cannot be soaked even in "living water".
The sultry summer and the lack of rain indicate that the plant struggled to survive throughout the season and therefore could not accumulate enough substances for the spring awakening - after such a summer, it is generally not worth harvesting grape cuttings.
Video: how to root grape cuttings
The cuttings that have received the warmth and attention of a caring winegrower will certainly delight you with a wonderful harvest of fragrant berries in 2-3 years. To get weighty bunches, remember that it is not recommended to plant more than 7 varieties in a summer cottage of 6 acres. At the same time, do not forget about plant protection products from diseases and pests, about watering in the dry season and shelter during frost.
